Showing posts with label craft. Show all posts

Tuesday, July 1, 2014

A Puppy Party for the littlest


Our littlest turned 6 a week or two ago. I've given up trying to slow down time. It just goes faster every year. So we threw a party, all about dogs, her favourite topic.

We did gross things like pick up 'dog poo', and slightly scary things like play balloon games with our rather large energetic dog Scout. The puppies up for adoption had crazy-big eyes but the kids each fell in love with their chosen pooch and officially named and adopted each one.

No girly colors or games for this Miss 6. She was happy playing on her new penny board or having Scout used for 'pin the tail.....no no, tie the party hat on the doggy'.


She and her friends decorated cupcakes with doggy faces, watched Beethoven on the projector screen and when her Dad and I were exhausted, her big sister took over and played party games with doggy crafts for prizes.


Of course there were tears of tiredness for our little introvert near the end and the usual quiet promise to ourselves to not have another party for a few years. 

Sighs of relief when the last little girl and her puppy left, from Scout too I'm sure!

                       
                       xoxo

Sunday, March 17, 2013

My {little golden nook} and some weekday creating

Can you hear my big Sunday night sigh?

The week is done and a fresh one begins tomorrow. I can't even remember why its been such a busy week. Harper has been sick and I now suspect a UTI, the poor poppit. Our 'Maisy' had her first ever sleepover party. We've all gone from forever hot and sleepless, to cold and just a little crazy.

And we ticked a few things off our 'finishing touches' (long) list...


:: Our little reading/cuddling nook is almost complete

:: My current favourite homey book 'Granny Chic' by Tif and Rachelle, best read IN the nook

:: I finally sewed together my vintage hankie curtain for the cubby shelf (there was such joy all around when we found my 'lost in transition' sewing machine this weekend)

:: A fun lamp upcycle project for Miss M's room

:: Every day is a crafty day for little H plus evidence that all is far from perfect here with boxes still to unpack

:: A 'tea and cake date' in the cubby was a big event for the stay-at-home two


xoxo


Friday, December 7, 2012

Anticipation


Our girls have been bouncing out of bed each day to open the Advent envelope for the day. They are excited to see what treat or idea Mummy has popped in there (the night before as I am not an organised person!), and in each they expect the next chapter of their story bible to be read or to read to each other.


 December 8. {I folded 24 little envelopes from vintage Little Golden Book scraps and pegged them to twine strung up with washi tape}


They go to sleep excited and wake with anticipation.  Their precious minds hope for a sugary treat or a small gift to bring joy that lasts a whole morning.  Each story they read from the Jesus Storybook Bible points to the coming of the King.  Each chapter anticipates the arrival of a small baby who is unfathomably more amazing than Santa or toys. So as we read through this book within the month of December, leading up to the 25th we count down and build excitement and anticipation of the deep deep beauty and joy of Christmas.  And as the girls receive small treats along the way, their anticipation builds for a day of bigger treats!


I used this simple Jesus Storybook Bible Advent Calendar to cut into strips and pop in each envelope.


Recently I found this advent reading list on Pinterest and was drawn to it because in the silliness of the season, the stress and child-centeredness of it all I forget to stop and revel in the Joy and truly feel the peace and meaning of the arrival of the only perfect Rescuer.


I've been meditating on Isaiah 11, trying to memorise it because its so beautiful.

I love being reminded of some of the OT passages where the birth of Jesus is predicted so accurately. It really helps me read the narrative of His birth in the gospels with fresh eyes.

And this particular passage from Isaiah is so full of hope!

Verse 10 - 'In that day the root of Jesse, who shall stand as a signal for the peoples- of him shall the nations inquire, and his resting place shall be glorious.'


We all anticipate things we can plan and touch and see. But for me, if I haven't collapsed from exhaustion beforehand, I do afterwards and I am all too aware with my limitations that the gifts and food and fun don't last and I'll get things wrong and my health will fail along the way.  But anticipating something so much bigger, more spectacular, something lasting........ Its sort of easier I think.


xoxo


Wednesday, December 5, 2012

A Christmas Mantel


We won't be in our home for Christmas this year.  Our little two bedroom cottage is being extended and we are staying with family or house-sitting while Blake works his fastest to complete the reno.  I've been missing our own space for the past couple of months, missing my home and its imperfect style, my place to create and play, and be at rest.

And I miss my mantel! A mantel is just the most fabulous blank canvas for christmas decorating, and its a central spot all year round for decorating fun depending on your mood or the occasion.


Well, The Lettered Cottage (the first blog I ever loved) is having a christmas mantel link party and I thought I'd link up with my mantel from last year just for fun.

We'd been in this house for just under a year and after we knocked a hole in the living room wall to assess the old fireplace behind it we realised we were going to have to build a whole new one, mantel and all! Oops. Thankfully my sister and hubs had just bought and an old character home in Geelong to open her project, The Birth House and they had a few too many (seriously!) beautiful old fireplaces and we scored one!  
So it went from this (at the original house)....


To this (in our home).......


To this! (thanks Josh & Jenna from The Block for the wall paint colour idea).....


A few months later it was November and my Christmas creative craze began....


 I made these white trees with white wool (yarn) wound around cones made out of paper, and the little stars with twine and glue make it firm.


 The felt ball garland I made by threading the balls onto embroidery cotton (  I wish I could say I hand-felted them)


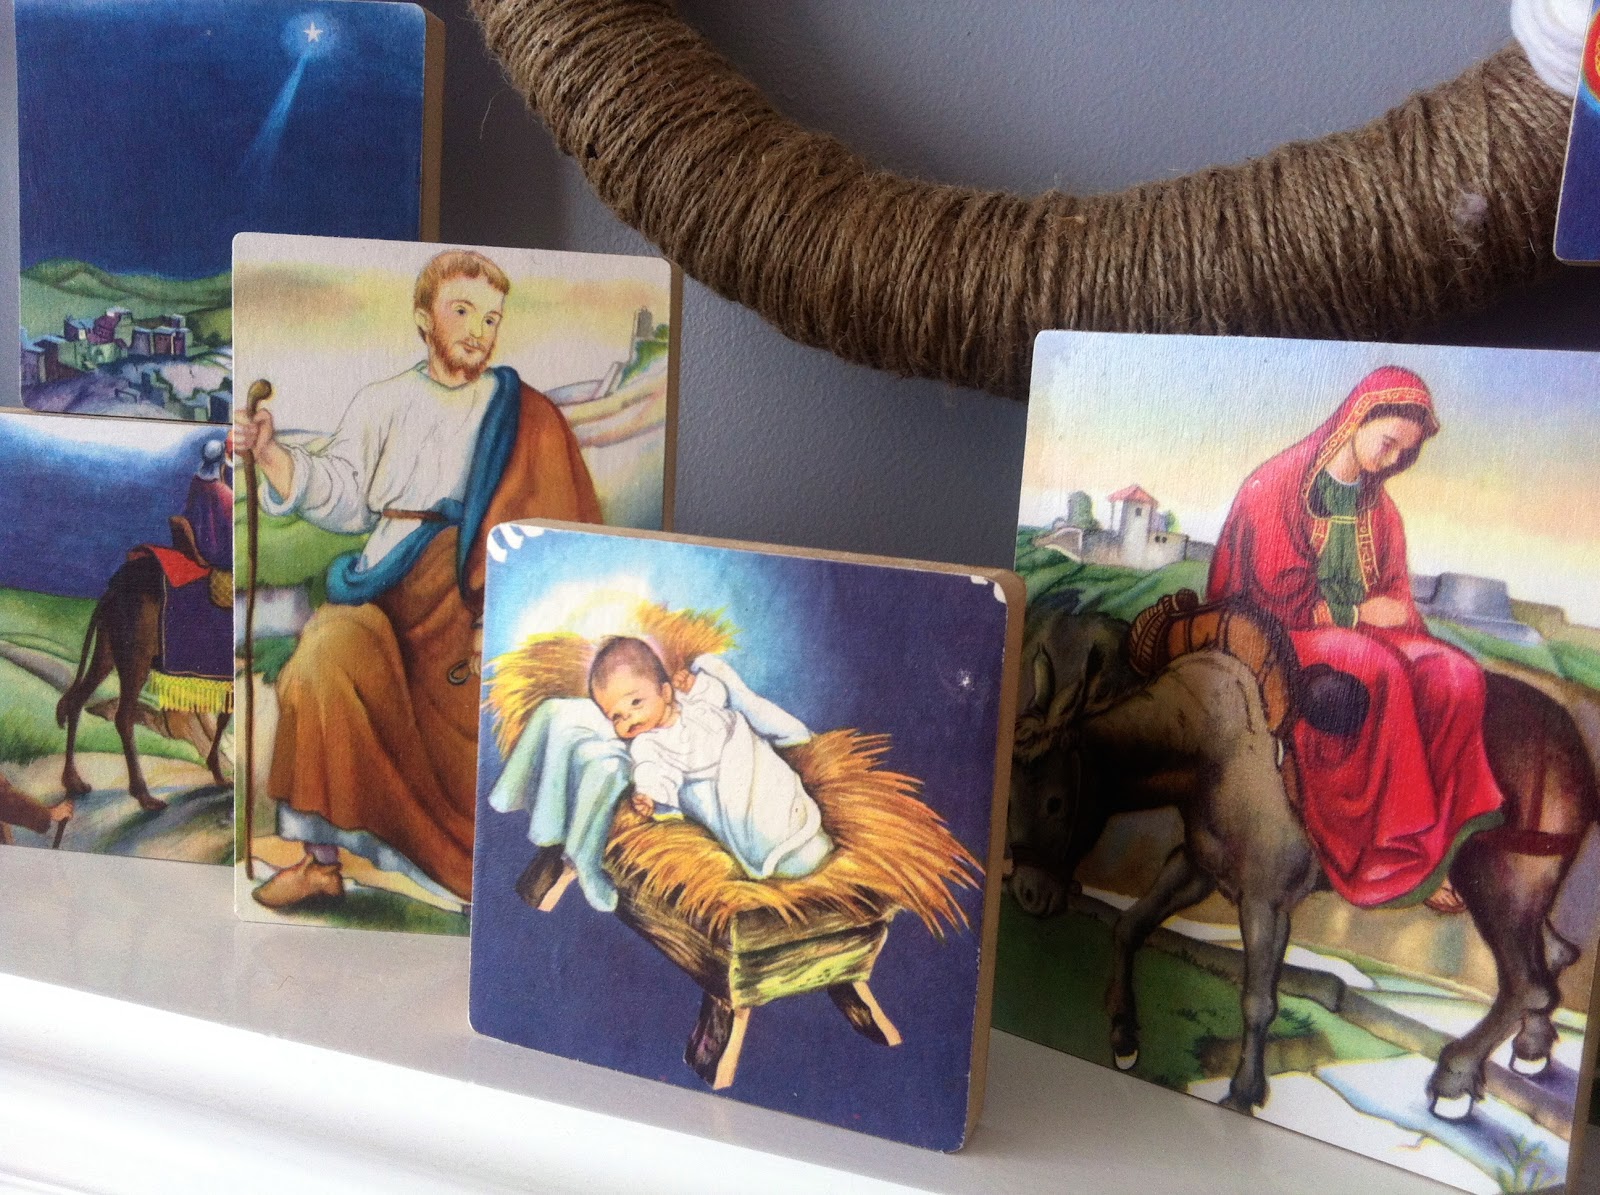
 I created the Nativity scene out of MDF wood and a vintage copy of 'The Christmas Story' Little Golden Book.


 The wreath I made from plumbers tubing from Bunnings, masking taped the ends together and stuffed wet, scrunched paper in the hollow to (try) to stop it from being floppy (NOT something I'll be doing again, its easier to pay the extra $4 for the polystyrene ones from Spotlight) I wound twine around it, added some lace and found some vintage baubles from the Oppy/thrift shop in the right colours and finished it off with some white felt flowers I'd already made.  


Meanwhile over in our tiny dining room I suspended a branch to the ceiling, attached flowers I made from old lace curtains and hung from it a little 'hope' (my favourite word).


xoxo

The Lettered Cottage

Wednesday, November 28, 2012

Crochet Star Tutorial


These star frames are a twist on the Mary Go Round crochet flowers by Lola Nova.  I've been making the flower frames for a couple of years to frame Little Golden Book pictures.  I've recently come up with a version of my own just in time for Christmas, the perfect handmade ornament for the tree! Use them to frame photos of family members or treasured Christmas pictures, or just leave it empty and let it hang amongst the lights!


Here's how to make them...

You will need to raid your daughters/friends dress up box or jewelry stash for a cheap thin(but rigid) metal bracelet as shown in the picture.  You can also pick them up at $2 shops, opp(thrift) shops or chain stores like Diva.

I’ve used 8 ply wool or acrylic yarn for all of my stars, and a 4mm hook. You can experiment with finer yarn or a larger hook if you like.

Stitches used:
* Slip Stitch (sl st)
* Chain Stitch (ch)
* Single Crochet Stitch (sc)
* Double Crochet Stitch (dc)
* Picot stitch

After attaching yarn to hook with a slip knot, attach your yarn to your bracelet with a slip stitch


(I usually use finer bracelets, you know the tacky silver, gold or metallic coloured ones? This one is a touch smaller in circle size but thicker to crochet around. Just see what you can find)

Chain 1, work a SC into the bracelet. Continue to work SC’s into the bracelet all the way around so that you cover all of the metal, but not so that it is bunched up (if that makes sense). Join to the first chain with a sl st.


(If you do too many stitches around you will end up with too many star points and they won't sit nice and flat)

 You can keep count if you like and you will finish with 49 stitches (including first chain) which makes things easier later, but I never do and always manage to finish with even ‘petals/points’ by adjusting the point width which I’ll explain later.


Chain 1, work a SC into the same stitch and each following stitch all the way around and join with a sl st.


*Skip 2 stitches and work a DC into the next stitch (the third stitch from the hook). Then do two more DC into the same stitch.
Picot stitch:  From here, chain 3, sl st into the first of these 3 chain stitches. Then do 3 more DC’s into the same stitch as the first 3. Skip 2 stitches and sl st into the next stitch.*

You will end up with your first star point with your 6 DC's and a picot st in between.


(for a full tutorial on how to do a picot stitch click here)

Repeat from * to * around the bracelet and pull through to finish.


Use a needle to weave the starting end through to meet the finished end so that you can tie them together to hang on your tree or garland.


Note: You can see if you look closely that my points are slightly uneven and the last three points are slightly wider than the first four. This is because I'm lazy and don't count my stitches!! Quite often I get it right anyway but I usually count my remaining stitches when I'm close to the end and modify the last few or even just one so that I use all the stitches. I don't think it matters in the end but thats just me and my love of imperfect creations :)  To modify you either (or both) skip and extra stitch before the first three DC's or after the last three. Or you your could skip three stitches all the way around if you'd like less points in your star. 


I hope I've made some sense in my first ever tutorial! AND I hope I've encouraged you to have yourself a handmade Christmas (one handmade ornament counts!!). If you can't crochet then enjoy making these mini paper lanterns I made with my daughters.....


xoxo

Sunday, November 25, 2012

A handmade Christmas

I love love love November!! The weather is warming up (yes, even in Victoria), the roses are blooming, the end-of-year Christmas parties have begun, and the end of the year is in sight!


My two favourite FAVE-ourite things about November are:

1. We start thinking about Christmas and Jesus' birth, the birth of a perfect King 2012 (approx) years ago. At our church we have a big 'Jesus birthday party' on christmas eve with a giant cake and lots of fun involved.  But in November we begin to teach the historical story of His birth both at school and in church to the kids, and at home we explore it with our own children.  If you are privileged enough to be one of these teachers or to be a parent, its in November that we start to get excited and to want to share your excitement with everyone....

2. And because of all of the above, my creative juices go bananas and I go slightly crazy with wool and paper and sticks and twine. The girls join in and we set about making our christmas a handmade one.


This November I jumped on board with Stacey from the gorgeous pilgrim styling to post a #creationaday on Instagram for the month. I knew I'd be making things almost daily anyway! Pop over to her amazing blog for some inspiration. Here are some of my makes...


My Crochet Star Frame tutorial/pattern is here.


And my 7 and 4 yr old girls have been having fun too..


I've written a full tutorial for this crochet star frame here.


I've missed a few days but not due to lack of creativity, more lack of time to finish and post a picture.  One day I made a yummy pizza, the next an advent calendar, then a giant star made from old fence pailings....

November is not over yet.... 
I hope I've inspired you even just a little :)